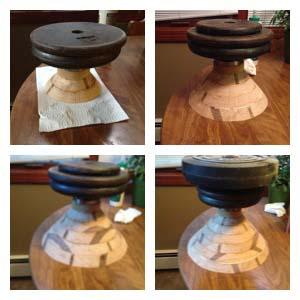
Here is how I completed my first bowl, which was made from two flat boards (Bowl From Board).
Tools needed:
- Ruler, Compass, Protractor
- Bandsaw
- Simple Disc Sander – Tutorial HERE
- Faceplate & Faceplate Centering jig – Tutorial HERE
- Lathe, tools, sandpaper and finish
Step 1 – Get Two Boards
Both of my boards are about 6” X 13”. I glued Cherry and Walnut together in no particular order. I want a “random” design when finished so nothing had to be symmetrical.
Step 2 – Measurements
I clamped the two boards together and found the center point. Using a compass, I made a 3-inch circle for the base of the bowl (1-1/2” on one board as shown below). I then made circles 3/4” greater than the base until I reached the end of my board.
Step 3 – Bandsaw Cuts
I adjusted my bandsaw table to 35 degrees, and cut out each half circle. Most people use 45 degrees but I did not want that steep of an angle.
Step 4 – Figure out Final Design
The three pictures below show different patterns I was able to use by rotating the segments. I chose the first picture, as I was going for the “random” look. Take your time to figure out which pattern looks best. I mark a line down the side of my bowl after I found the design I was looking for.
Step 5 – Sanding
I hand sanded the ends in preparation for my glue up. I used a piece of glass that was left over from an old refrigerator since its perfectly flat and easy to clean.
Step 6 – Glue Ups
Using a ton of calls, clamps, weights and patience, I glued the rings together on my flat work surface.
*Tip* Since my Bowl Cut-offs have the same angle as my rings, I cut the cutoffs down and used them for clamping. I ended up hot gluing them to the side of my bowl so they did not move during my glue up.
Step 7 – Sanding….Again
Using my homemade disc sander, I sanded both sides of my rings so I get a perfect glue up.
Step 8 – Face Plate and Sacrificial Wood
Take a scrap piece of wood and cut a circle with your bandsaw. It should be slightly larger than your faceplate (I used Cherry, not mdf as shown below. That blew apart quickly). True it up so there is no wobble.
Step 9 – Glue up…Again
Using weights, I glued the rings together, one at a time, making sure each ring is centered. Some people use a homemade ring press, but I was all jigged out. I just wanted my finished bowl. I will be making one in the future but for now, weights worked fine.
Step 10 – Lathe Work!
Attach the bowl to your lathe and turn the outside, and then the inside of your bowl.
Step 11 – Hours of Sanding
For the outside, I found that my orbital sander works best with my lathe running at low speeds. For the inside, I used a stick with a shirt balled up, rubber banded together with sandpaper stuck to the end. Use what works best for you, and be careful.
Step 12 – Apply Finish
I used doctor’s woodshop bowl finish that is food safe. Apply (3) coats to the entire piece and then apply wax topcoat (also doctor’s woodshop). Use whatever finish works best for you.
Step 11- Reverse Mounting
I chose to use the tape chuck method, but there are many other ways to achieve this step. Here is a great article from cumberlandwoodturners.com on different methods.
Use plenty of tape – You do not want this thing moving on you.
After the sacrificial piece was turned, I worked on my bottom profile.
After the bottom is square and sanded, finish was applied.
And there you have it, a tutorial on a Bowl from Board. I hope this was useful and informative.
Chris


Very nicely done! Some day maybe I’ll be brave enough to try this.
Thanks! You should give it a try. It was so fun, I’m already making two more.