One of the projects I have been working on is a cherry baby crib for my wife who is due in two months. I am in the finishing process and only have 2 sides more to complete. Before I really got into wood working, I used to stain all of my projects and would slop on about 2-3 coats of polyurethane and call it a day.
First, a crib I built for my nephew 2 years ago.

The crib actually took 6 months to construct because I was working with my dad who had a busy schedule, and because I did not know what I was doing. This crib consists of re-claimed maple for the 4 legs and rough cut maple that I planed down for the rest. The re-claimed lumber was bench seating used in Cleveland Clinic hospitals. This project still gives me nightmares because of the finishing process. Here are two issues:
1 – My sister wanted me to use water based stain so there were no VOC’s. I could not apply this stain with out getting streaks, and could not blend coats for the life of me. After applying this particular stain to all 8 sides of the crib, I decided this would not be acceptable and started sanding.
2 – Fast forward 2 months – Sanding was complete and I was ready to apply a new type of stain. I chose Red Mahogany oil-based stain mixed with ebony to achieve a real deep dark red. Unfortunately for me, I did not realize that maple was extremely tight grained, and would not accept the oil based stain. I was forced to brush on a light layer of stain, wait 2 days for it to harden, and cover with polyurethane. Sloppy to say the least. Another word could be – hackish
Although the crib made my sister happy and turned out fairly well, I could not get over the brutal experience that was happening to me over and over again. Every project was the same – Construction was a blast, finishing was dreadful. Stain and poly equaled poor results for me. When it came time for me to make a crib for myself, I refused to go through that pain again. After several hours of research, I made the decision to switch from oil based stain to dye.
For the dye, I chose general finishes from Woodcraft, color – Merlot. For finishing, I actually used three different products:
SealCoat sanding sealer – (1) coat
Seal a Cell 0 – (2-3) coats
Arm-R-Seal topcoat – (2-3) coats

Here is a picture of the side rail with one coat of Sealcoat Sanding Sealer.
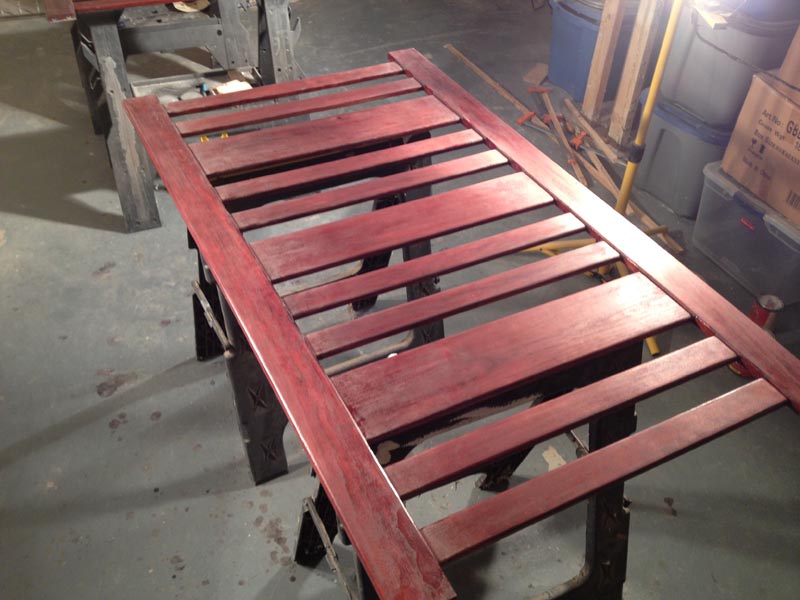
As soon as I moved onto step two (Seal a Cell), the finish started to really take form. The dyed wood did not look bland or dry anymore, and the wood grain started to show.

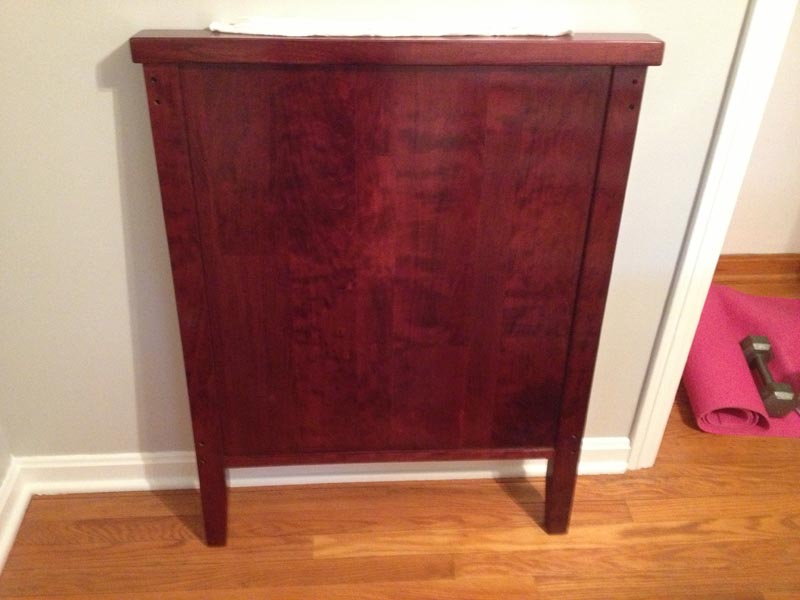
After the topcoat was applied, I finally had a piece of work that I was proud to show off to anyone (End panel shown since side panel is not complete):

Pingback: Finished Crib – Project Showcase | Together We Wood